
Creating your first shop
Sign up, name your shop, and Vende sets up a branch, a warehouse, cash accounts and a getting-started list for you right away.
On this page
To start using Vende, you only need to create an account and then a shop. You can do it all from a phone or a computer, and it takes a few minutes.
Creating an account
- Open the Vende website, then press Try It Free.
- Fill in Full name, Email address, Password and Repeat password.
- Press Sign up.
By signing up, you agree to the Vende Terms of Service and Privacy Policy. You can open both from the links below the fields.
Creating the shop
Once the account is created, Vende opens the Create your shop page right away.
- Fill in Shop or business name, for example Toko Berkah. This name appears on receipts and in your app address.
- Fill in the shop's Phone if you have one.
- Choose the Type of business closest to yours. Type to search, for example "grocery". The type of business must be chosen.
- Press Create shop.
Tip: The type of business is your shop's package. Vende prepares the product categories, units, expense categories and extra features that suit that type of business. Your type of business is not listed? Press Contact us under the choice to chat with the Vende team on WhatsApp, or choose the closest one for now. The Vende team switches on other features when you need them. See Extra shop features.
What Vende sets up right away
As soon as you press Create shop, the shop is ready to use. Vende has already set up:
- the Head Office branch with the Main Warehouse (factory business types: the Finished Goods, Materials, Production and Returns Warehouse);
- four cash accounts: Owner Cash, Cashier Cash, Bank BCA and Bank BRI;
- units, product categories and expense categories that suit your type of business, under the category Operating Expenses, plus Non-operating Expenses for expenses outside the business;
- the income categories Operating Income and Non-operating Income (with Bank interest and Other under it);
- the extra features of your type of business's package;
- your account as the shop owner, with every permission.
These names are written in the language the site was set to when you created the shop. You may rename the cash accounts and the warehouse later. Your shop's app address uses the shop name. Toko Berkah, for example, opens at an address ending in /app/toko-berkah.
Your first shop gets a free trial. You can see your shop's package, trial and features in Settings → Subscription. See Your shop's package, price and limits.
Email verification
Vende sends a verification link to your email address. Open that email, then press the link.
- Before your email is verified, you can already use the shop to sell and record as usual.
- But you cannot pay for the subscription yet, and you cannot add staff yet.
- The verification deadline is written in the notice at the top of every page. After that date, the shop panel only shows the verification page until your email is verified. The shop's data stays safe.
No email yet? Check your spam folder, or press Resend verification email in that notice. If the address has a typo, change it with Change email. See Verifying your email.
Next steps
Once the shop is created, you land on the Dashboard. It shows the Getting started list: six steps to start using Vende.
- Enter shop details & logo
- Add a product
- Add a customer
- Enter opening balances
- Set the receipt paper size
- First sale
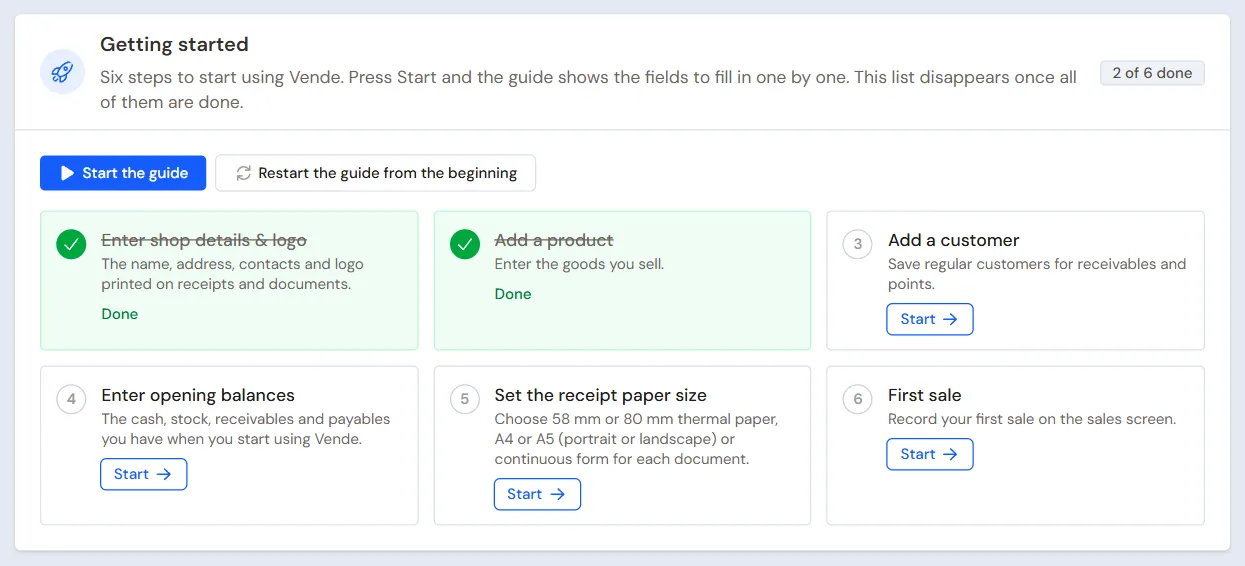
Press Start on a step. The guide then shows you the fields to fill in, one by one.
The full explanations are also here: Filling in the shop details and logo, Adding products and customers, Entering opening balances, Choosing print paper, and Choosing a sales screen.
Some business types have a full learning guide for the team, for a new business and a running one, from master data to going live, grouped by business type group in the section Guides by business type, for example Drinking water factory guide. The links to the guide and its two parts also show under the getting-started list of a shop of that type.
The list is no longer shown once the shop records its first sale. To bring it back, open Settings → Shop, then press Show the getting-started guide.
Tip: Lost on a page? Press the ? button at the top of that page. Vende explains that page step by step.
Setting up a shop for a presentation to a prospective customer? Press Run demo on the Dashboard: a new, still empty shop is filled with the sample data of its business type, then the demo tour walks you through it. See Running the demo in a new shop.
Supporting reading
Articles on the background and the arithmetic.
- Langkah Membuka Toko Kelontong dari Nol, Urutan Persiapannya Urutan persiapan membuka toko kelontong dari nol: memilih tempat dan pelanggan, menghitung modal, izin, pemasok, sampai bulan pertama.
- Cara Membuat NIB untuk Toko Kecil Lewat OSS Langkah membuat NIB lewat oss.go.id untuk toko kecil, dokumen yang disiapkan, dan hal yang sering membuat pengajuan tertahan.